2026 Top Guide How to Replace Mini Excavator Rubber Tracks?

Time:2026-09-19 Author:Isabella
0%

Replacing mini excavator rubber tracks looks straightforward, but small mistakes can damage the undercarriage. This 2026 guide explains How to replace rubber tracks on a mini excavator? It presents a practical method for owners, operators, and maintenance technicians. The instructions focus on safe preparation, correct measurements, and careful track installation.

A worn track may show cracks, exposed steel cords, uneven lugs, or repeated derailment. Measure the existing track carefully. Check its width, pitch, and link count before ordering a replacement. Track markings can fade, so never rely on appearance alone. The machine’s model number and serial plate provide better evidence.

Safety comes first.

Park on firm, level ground. Lower the attachment, stop the engine, and release hydraulic pressure according to the manufacturer’s manual. Use approved lifting equipment and secure the excavator before raising one side. Never place any part of your body beneath an unsupported machine.

The guide covers relieving tension, removing the old track, fitting the new rubber track, and adjusting sag. It also explains how to inspect rollers, idlers, sprockets, and grease cylinders during the process. A new track can fail early if worn components remain hidden underneath.

Based on common workshop practice, slow movements usually prevent expensive damage. Still, every excavator differs slightly. Some procedures may require specialized tools or a trained technician. That limitation matters. Manufacturer specifications should control final tension, torque, and inspection intervals.

Expect dirt, resistance, and a few adjustments. Do not force the track with uncontrolled hydraulic pressure. After installation, operate the excavator slowly and recheck alignment, tension, and unusual noise. Careful maintenance improves service life, stability, and working confidence.
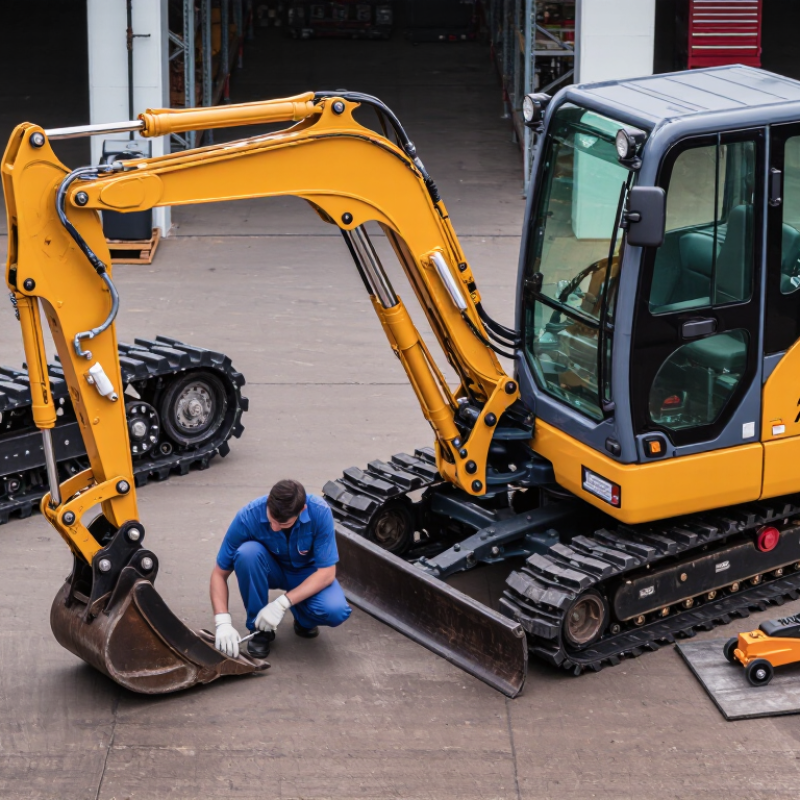
2026 Top Guide How to Replace Mini Excavator Rubber Tracks?

Mini Excavator Rubber Tracks: Replacement Basics and Safety Preparation

Replacing mini excavator rubber tracks starts with preparation, not force. I inspect the undercarriage, sprocket, idler, rollers, and track tension before ordering parts. Measure width, pitch, and link count from the old track and machine data plate. A wrong measurement can delay the job. Park on firm, level ground, then lower the attachment and shut off the engine. Remove loose mud and stones around the frame. They can hide damaged components.

Wear safety footwear, gloves, eye protection, and close-fitting work clothing. Keep bystanders away from the working area. Never rely on the boom or a single jack to support the machine. Use rated lifting equipment and approved support stands on stable ground. Relieve track tension slowly, because trapped grease or pressure may release suddenly. I once rushed this step and found a cracked fitting during inspection. That mistake changed my routine. Pressure deserves respect. Stay clear.

With the machine safely raised, loosen the tensioning valve gradually. Push the idler inward, then remove the track from the sprocket and rollers. A pry bar may help, but keep hands away from pinch points. Fit the new track over the sprocket first, then guide it across the rollers and idler. Adjust tension according to the machine manual, not by guesswork. Too tight increases wear; too loose can derail during turning. Run the excavator slowly, check alignment, and inspect the tension again after a short test.

Tools, Parts, and Track Tension Checks You Need Before Starting

2026 Top Guide: How to Replace Mini Excavator Rubber Tracks?

Before replacing a mini excavator rubber track, park on firm, level ground. Lower the attachment and release hydraulic pressure. Wear gloves, safety boots, and eye protection. Prepare a socket set, breaker bar, pry bar, grease gun, measuring tape, and a track tension gauge. A second person can help control the track safely. Never work beneath a raised machine.

Check the replacement track’s width, pitch, link count, and tread direction. Compare these details with the machine manual and the old track. Inspect the idler, drive sprocket, rollers, and frame for sharp damage or heavy wear. A new track may fail early if worn components remain. Loosen the tension valve slowly. Grease can escape under pressure. Keep your face and hands away from the valve opening.

Tips: Clean packed soil from the undercarriage before fitting the track. Use the boom carefully to lift one side, but never rely on hydraulics alone. After installation, rotate the track slowly and watch for sideways movement. Measure track sag at the specified location. Too much tension increases heat and roller wear. Too little tension can cause derailment. Check again after several operating hours. I have seen careful replacements go wrong because the final tension check was rushed. It is an easy step to underestimate.

2026 Top Guide: How to Replace Mini Excavator Rubber Tracks?

Typical planning time for replacing one mini excavator rubber track. Actual duration depends on machine size, access, track condition, and operator experience.

Before starting: prepare lifting and blocking equipment, suitable hand tools, a grease gun or tension-release tool, replacement track parts, and the manufacturer’s track-tension specification. Always secure the excavator before lifting the undercarriage.

How to Remove the Old Rubber Tracks Safely and Efficiently

Before removing old rubber tracks, park the mini excavator on firm, level ground. Lower the attachment and shut down the engine. Relieve stored hydraulic pressure through the controls, then remove the key. Raise the machine with the boom and blade, but never trust hydraulics alone. Place rated support stands beneath the frame. A second person helps. Work slowly. Locate the track tensioner near the front idler. Clean the area before loosening the grease release valve. Turn it carefully, allowing grease to escape into a suitable container. Keep your face and hands away from the valve. The pressure can be unexpected. Follow the machine’s service manual because tensioner designs differ.

With the track slack, use a long pry bar to lift the rubber track from the sprocket. Rotate the sprocket gradually, using the excavator controls only when the area is clear. Never place fingers between the track, rollers, or sprocket. Remove the track from the idler after it leaves the sprocket. Inspect the rollers, sprocket teeth, idler, and frame for sharp damage or packed debris. Small cracks or worn teeth may shorten the new track’s life. I have found that rushing this step causes more trouble than the removal itself. A pry bar can slip. Stand to the side, not directly in its path. Clean the undercarriage before installation, even when it appears acceptable.

Step-by-Step Guide to Installing New Mini Excavator Rubber Tracks

Replacing mini excavator rubber tracks is safer when the machine is clean, stable, and fully supported. A 2024 EquipmentWatch maintenance-cost report identifies undercarriage wear as a major ownership expense. Small mistakes can become costly.

Park on firm, level ground. Lower the blade and boom, then shut off the engine. Use approved lifting equipment and never trust hydraulics alone.

Remove packed soil around the sprocket and idler. Slowly loosen the grease valve to release track tension. Do not stand in the track’s path. A flat bar can help pull the old track away, but forcing it may damage the rollers.

Fit the new track over the sprocket first, then guide it around the idler. Rotate the track slowly while keeping hands clear.

Add grease until the track reaches the service deflection stated in the equipment manual. Tension varies with track size and frame design, so guessing is not professional practice. A 2024 compact construction equipment outlook from Off-Highway Research reports continued growth in compact excavator use, increasing the value of careful field maintenance.

Run the machine forward and backward for several minutes. Recheck alignment, tension, loose bolts, and unusual noise.

I have found that “tight enough” is not a reliable measurement. A second inspection is worth the extra minute.

Final Alignment, Tension Adjustment, and Post-Replacement Inspection

After fitting a mini excavator rubber track, alignment deserves more attention than speed. Park on firm, level ground and lower the attachment for stability. Lift one side only with approved equipment, then check that the track sits evenly around the sprocket, rollers, and front idler. The guide lugs should remain centered. A few millimeters of misalignment can become visible damage after several working hours.

Adjust tension according to the machine’s service specification, not by appearance. Add grease gradually through the tensioning valve, then rotate the track slowly to distribute pressure. Measure the prescribed sag at the correct point, using a straightedge and ruler when necessary.

Excessive tension increases roller and idler load. Loose tension can cause derailment. Small changes matter. Release pressure carefully and keep hands away from moving components.

Operate the excavator at low speed for several minutes, including gentle forward and reverse movements. Recheck the track position, sag, and sprocket engagement afterward. Inspect for twisted lugs, exposed cords, uneven sidewalls, or grease leakage near the tensioner.

I have seen a replacement appear perfect until the first short test exposed an idler alignment problem. That is why visual inspection alone feels insufficient. Record the final measurement and inspect again after the first few hours of work. Human judgment can miss a gradual shift.

FAQS

What should I do before replacing a mini excavator rubber track?

Park on firm, level ground. Lower the attachment and release hydraulic pressure. Wear gloves, safety boots, and eye protection. Prepare sockets, a breaker bar, a pry bar, grease, and a measuring tape. Never work beneath a raised machine.

How can I confirm that the replacement track fits?

Compare its width, pitch, link count, and tread direction with the manual and old track. Check the drive sprocket and idler too. A matching track can still fail early when these parts are badly worn.

How do I release track tension safely?

Clean soil around the tension valve. Loosen it slowly because grease may escape under pressure. Keep your face and hands away from the opening. Do not stand in the track’s path.

What parts should I inspect before fitting the new track?

Inspect the idler, sprocket, rollers, and frame for sharp damage or heavy wear. Remove packed soil first. Replacing only the rubber track may not solve the real problem.

How should I install the new rubber track?

Fit the track over the sprocket first. Guide it around the idler afterward. Rotate the track slowly while keeping hands clear. A flat bar may help remove the old track, but forcing it can damage rollers.

How tight should the new track be?

Follow the machine’s service specification and measure the stated sag. Add grease gradually through the tensioning valve. Do not judge tension by appearance alone. “Tight enough” is not a dependable measurement.

How can I check track alignment after installation?

Lift one side with approved equipment, never hydraulics alone. Confirm that the track sits evenly around the sprocket, rollers, and idler. Keep the guide lugs centered. A few millimeters of misalignment can become visible damage later.

What should I inspect during the first test?

Move forward and backward slowly for several minutes. Watch for sideways movement, unusual noise, twisted lugs, exposed cords, uneven sidewalls, or grease leakage. Stop and inspect again. Visual inspection alone can miss gradual movement.

When should I recheck the replacement track?

Measure the sag again after the short test and after several operating hours. Check alignment, bolt tightness, and sprocket engagement. Record the final measurement. I sometimes underestimate this step, and rushed checks can hide early problems.

Conclusion

This guide explains How to replace rubber tracks on a mini excavator? with a clear focus on preparation, safety, and correct installation. Before beginning, park the machine on firm, level ground, lower the attachment, shut down the engine, and release stored hydraulic pressure. Prepare suitable lifting equipment, hand tools, replacement tracks, and the required track-tension materials. Inspect the undercarriage, rollers, sprockets, and idlers so worn or damaged components do not affect the new tracks.

The removal process involves safely raising and supporting the excavator, loosening track tension, and carefully working the old track away from the undercarriage. The new rubber track should be positioned evenly around the sprocket and idler, then seated gradually while avoiding pinch points. After installation, adjust the tension according to the machine’s operating requirements, confirm that the track runs centrally, and inspect all fasteners and components. A slow test movement and final check can help identify misalignment, unusual noise, or incorrect tension before normal operation.

Isabella

Isabella

Isabella is a dedicated marketing professional with a sharp focus on driving brand growth and engagement through strategic content creation. With an extensive background in digital marketing, she combines her passion for storytelling with her keen understanding of industry trends to deliver......